
1955 Ford - Thunderbird.
Left front fender
I cut out the front light area.


Fitting in pressed part I purchased, not happy at all with the way it was made. I had to do a lot of pounding on it to make to even close to what i wanted.

Mounted plate for headlight mounting.

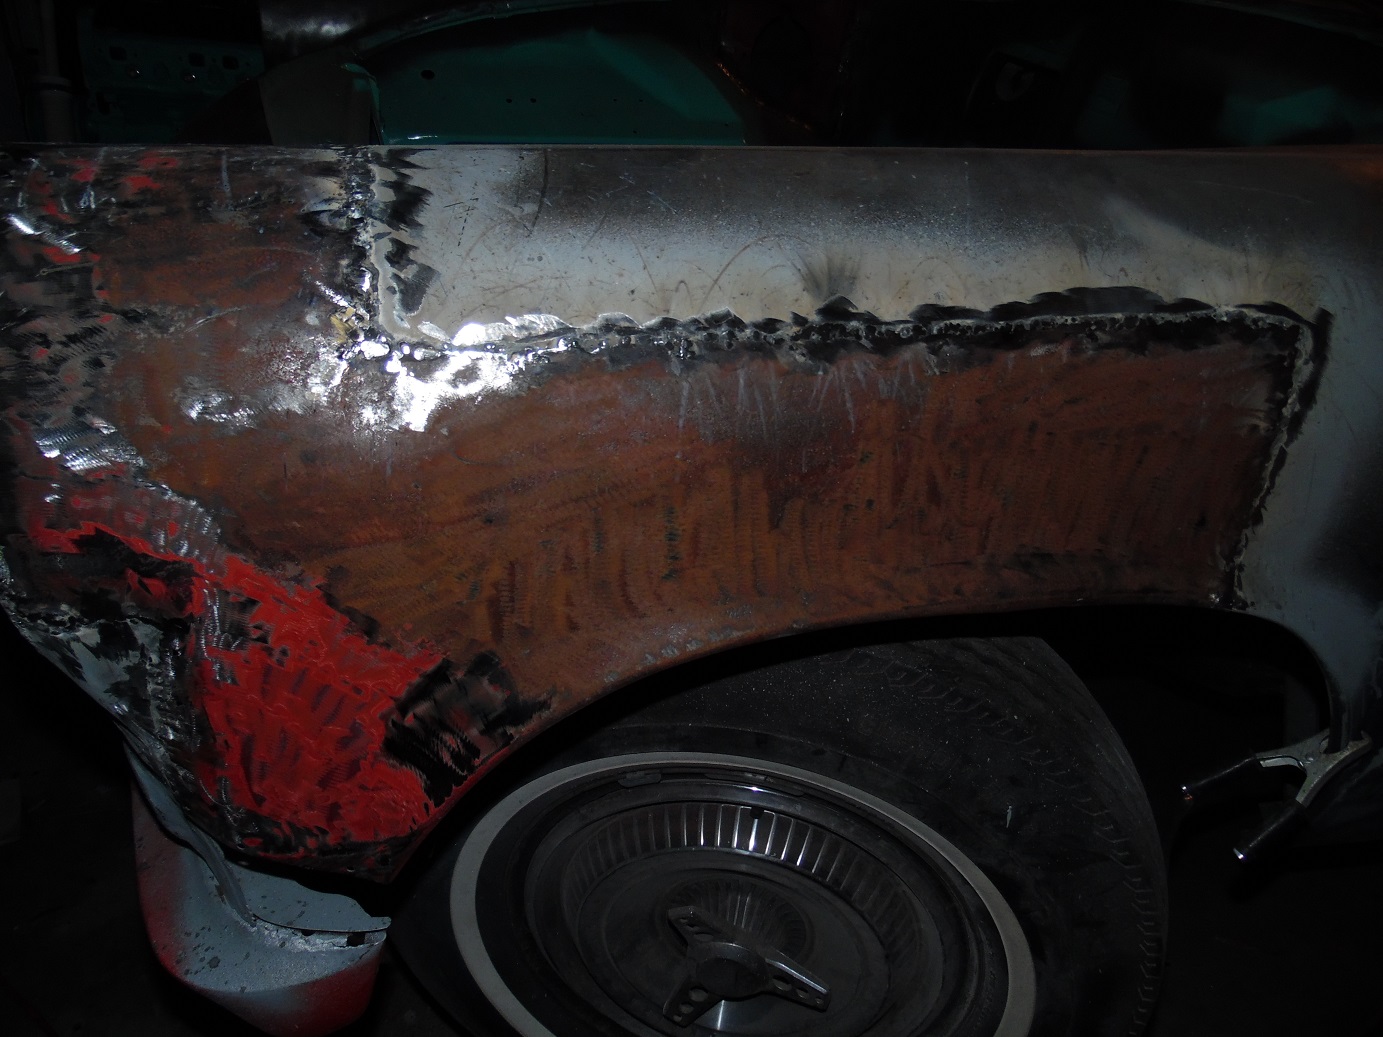
All metal on the side to be removed is marked out here.

This entire area was covered over with tin with pop rivets. All the damaged and rusting metal was just covered over. It had almost an inch of Bondo.

Fitting metal here.


I use self tapping sheet metal screws to orientate the metal pieces. The holes they leave are actually used as spot weld points.

Some spot welds are applied here to help hold everything in place.

Using a template from the other side I cut out the light plate.

Most of it is welded in place now. I don't like the right weld so I cut it back loose.


The weld has been removed here. The line drawn around the wheel well is the area that needs to be replaced. It has too many bends and flanges to make by hand. This part has been cut out of a fender on a salvage yard car. Just that piece of a fender took me a month to find and will cost over 600 bucks. A complete fender, if you can find one will run you as much as 2 grand.

This is the fender I am getting.

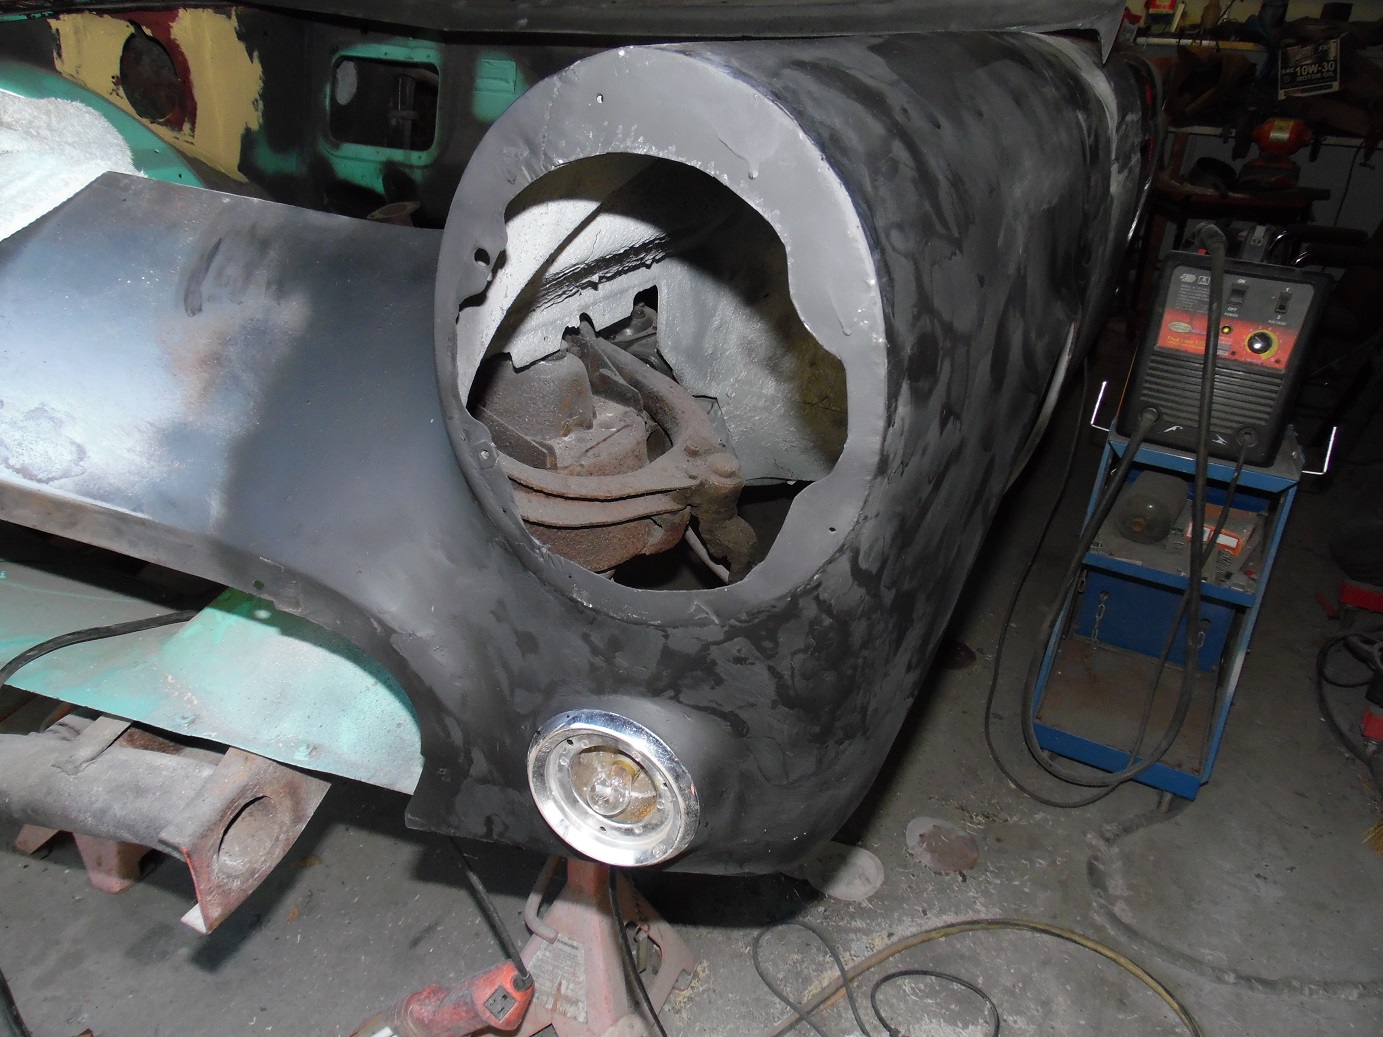
I had to mount the front spoiler to get the proper fit on the new fender panels.

This is as far as I can go until I get the wheel well piece in the mail. Hope it gets here soon.
The continuation.

The fender is not up to par, so I cut out a lot of what I did so far and started over.


I set up the bottom template to get the right shape.

This is the new (old) fender. I cut out what I want to use.

Setting it into place for final measurement

Proper shape now.

Ready to weld.

So far so good.


Bottom front piece on the new fender was not useable, so I cut a piece out of the original fender and modified it to fill in.


Primed and not looking bad, but a long way from done.


Lead will make this look better.

Lead here too.

The piece I bought for the parking light area wasn't even close to being the right shape. Big fail on this part. so I cut and filled it to get it closer.

That's better.

Tried the parking light, perfect fit.

Some fine tuning still needed.

Ready to start on the doors.
To make comments about this page:
Email me at ZOT@YEZOT.COM